
Webpage Design I: Day Three
Phase 3 – WordPress Installation and Configuration
- Installing WordPress
- WordPress Dashboard
- Website Settings
- Themes and Plugins
- Creating Pages and Posts
WordPress
You can install WordPress on Hostinger quickly using either the hPanel Auto Installer or the Onboarding Wizard.
Here are the step-by-step methods to get your website live.
Method 1: Using the Auto Installer (Best for existing accounts)
If you already have a Hostinger hosting plan and a domain set up, use the built-in 1-click tool.
- Log In: Open your Hostinger hPanel and go to the Websites section.
- Select Dashboard: Find your domain name and click Manage to open its dashboard.
- Open Auto Installer: Look at the left sidebar menu. Navigate to Website → Auto Installer.
- Choose WordPress: Click on the WordPress option.
- Fill in Details: Complete the required configuration fields:
- Website Title: Enter the name of your brand or site.
- Administrator Email & Username: Set your login name.
- Administrator Password: Create a strong password.
- Install: Click Next, choose the latest version, and hit Install. Wait a couple of minutes for it to complete.
Method 2: Using the Onboarding Flow (Best for new accounts)
If you just purchased a hosting plan, Hostinger will automatically prompt you through an interactive setup guide.
- Start Wizard: Click Setup next to your new hosting plan or select Create or migrate a website.
- Select Platform: Choose Create a new website and select WordPress (or WordPress with AI).
- Set Up Credentials: Choose your admin panel language, email, and a secure password.
- Skip Add-ons: Skip the template and plugin pre-selections if you prefer to build a clean site from scratch.
- Link Domain: Select your registered domain name or claim your free domain to finish the installation.
How to Access Your New WordPress Dashboard
Once the installation finishes, you can log into your website using two methods:
- Via hPanel: Go to Websites, click Manage, and hit the Admin Panel button to log in automatically without a password.
- Direct URL: Type
://yourdomain.cominto your web browser and enter the admin credentials you created during setup.
To ensure everything runs smoothly from day one, remember to check the WordPress Overview section in your hPanel to verify your free SSL certificate is active and forcing secure HTTPS connections.
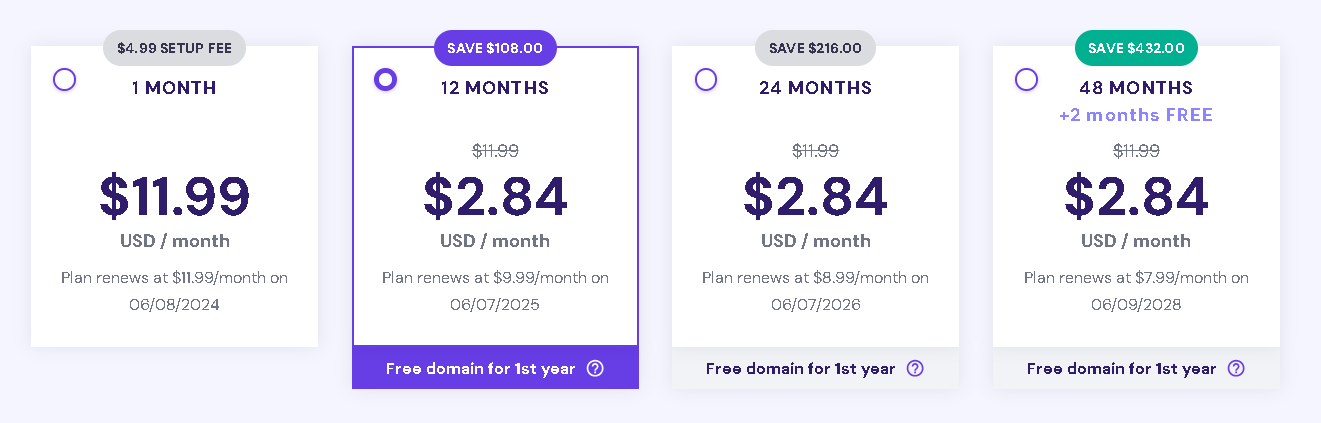
Set up your Domain and hosting account
- As part of the class, you will be provided with a one-year hosting plan, which includes a domain name.
- After class completion, technical support will be provided through the hosting provider.
- No fees will be applied to your account unless you add a web feature after your account has been setup.
- 100 Websites
- Managed WordPress
- 100 GB SSD Storage
- Hostinger Website Builder
- Free Domain ($9.99 Value)
- Free Automatic Website Migration
- Free Email
- Unlimited Free SSL
- Weekly Backups
- Starter WooCommerce
- Free CDN
- Dedicated IP Address
- Priority Support
Hosting Provider
Setup your Domain and hosting account
WordPress
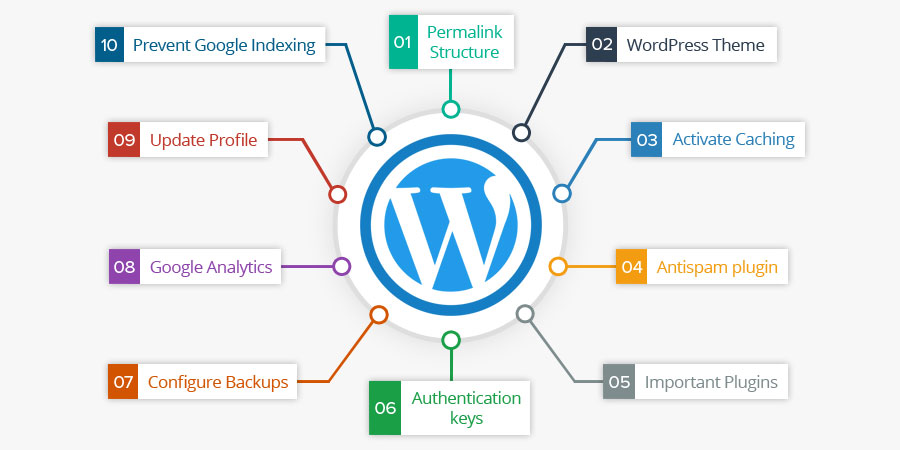
- An Introduction to WordPress
- Is WordPress Free? What Are the Hidden Costs?
- What’s the Difference Between WordPress.com and WordPress.org?
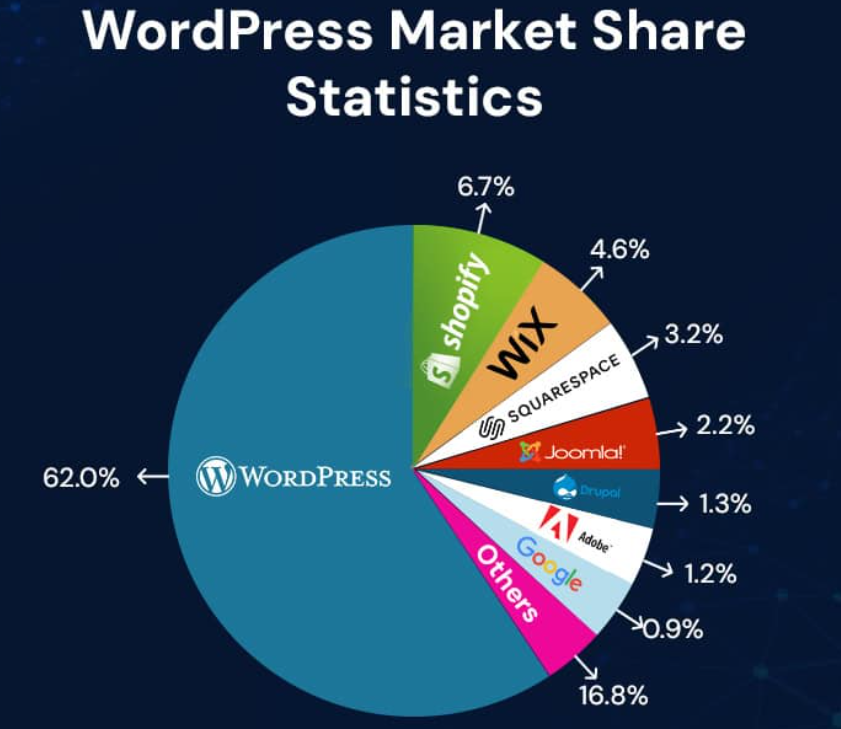
- Why You Can Trust WordPress as Your Website Publishing Platform (5 Reasons)
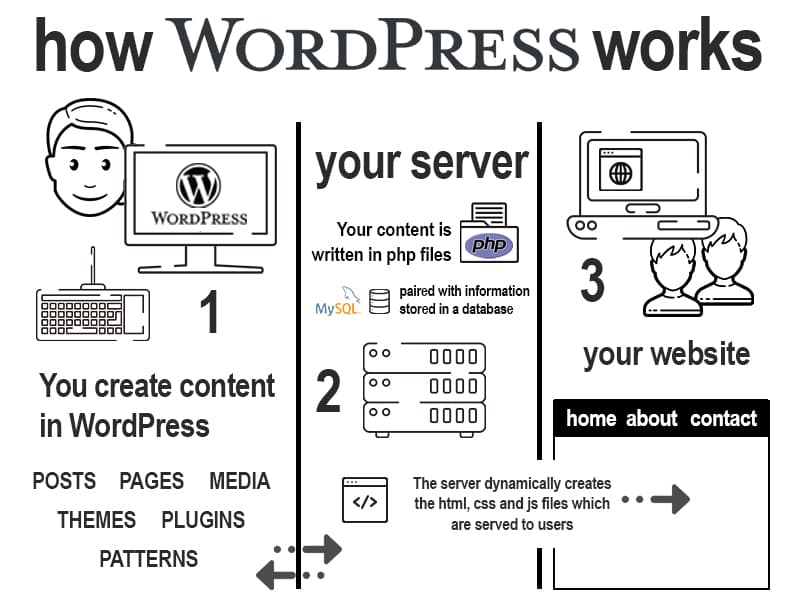
WordPress Concepts
Your Project
WordPress Technical