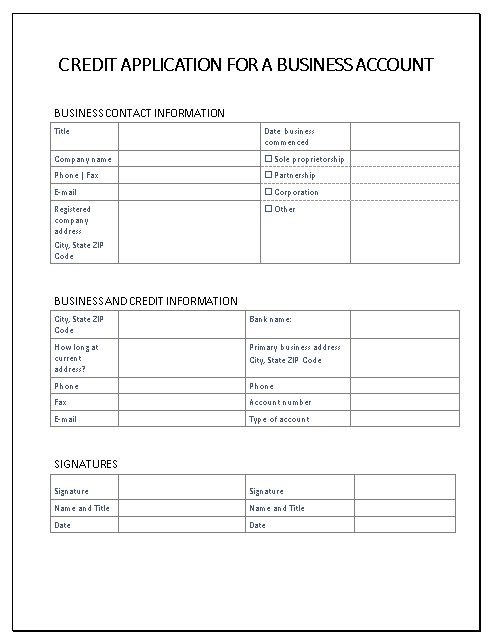
Step-by-Step: Create the Credit Application Form in Microsoft Word
1. Start a New Document
-
Open Microsoft Word
-
Click Blank Document
-
Set font:
-
Font: Calibri or Times New Roman
-
Size: 11 or 12 pt
-
2. Create the Title
-
Type:
CREDIT APPLICATION FOR A BUSINESS ACCOUNT -
Highlight the text
-
Format:
-
Bold
-
Center align
-
Font size: 14–16 pt
-
3. Add Section Header: Business Contact Information
-
Press Enter
-
Type:
BUSINESS CONTACT INFORMATION -
Format:
-
Bold
-
Left aligned
-
4. Create the First Table (Main Form Layout)
-
Go to Insert → Table
-
Insert a 2-column table (about 10–12 rows)
5. Fill in Left Column Labels
Enter the following in the left column:
-
Title
-
Date business commenced
-
Company name
-
Phone | Fax
-
E-mail
-
Registered company address
-
City, State ZIP Code
-
(Leave a few blank rows for spacing)
6. Add Business Type Options
In a new row, type:
Partnership
Corporation
Other
Format as Checkboxes: (This is Optional)
-
Highlight each option
-
Go to Developer Tab → Check Box Content Control
If Developer tab is not visible:
-
Go to File → Options → Customize Ribbon → Enable Developer
7. Add Second Section: Business and Credit Information
-
Press Enter below the table
-
Type:
BUSINESS AND CREDIT INFORMATION -
Make it bold
8. Insert Second Table
-
Insert another 2-column table
-
Add rows for:
Left column:
-
City, State ZIP Code
-
Bank name
-
How long at current address?
-
Primary business address
-
City, State ZIP Code
-
Phone
-
Fax
-
Account number
-
E-mail
-
Type of account
9. Adjust Table Formatting
-
Select each table
-
Go to Table Design
-
Apply:
-
Borders: All Borders
-
Optional: Light shading for headers
-
-
Adjust column widths:
-
Left column: narrower (labels)
-
Right column: wider (input fields)
-
10. Create Signature Section
-
Press Enter after the table
-
Type:
SIGNATURES -
Make it bold
11. Insert Signature Table
-
Insert a 2-column table with ~4 rows
Fill it like this:
| Left Column | Right Column |
|---|---|
| Signature | Signature |
| Name and Title | Name and Title |
| Date | Date |
12. Add Signature Lines
-
Click in cells under “Signature”
-
Go to Insert → Shapes → Line
-
Draw a line OR type:
________________________
13. Final Formatting
-
Ensure consistent spacing
-
Align everything neatly
-
Use bold for section headers
-
Add extra spacing between sections
14. Save Your Document
-
Click File → Save As
-
Name it:
Your Project should look like this